Site-to-site VPN
Configure your firewall
This page is for the IT administrator who manages the office firewall. It covers the Connection tab of Network, Site-to-site VPN in the Computle Portal.
Settings for your firewall
Section titled “Settings for your firewall”The first card, Settings for your firewall, holds Computle’s side of the tunnel. Enter these values on your firewall. Each has a copy button.
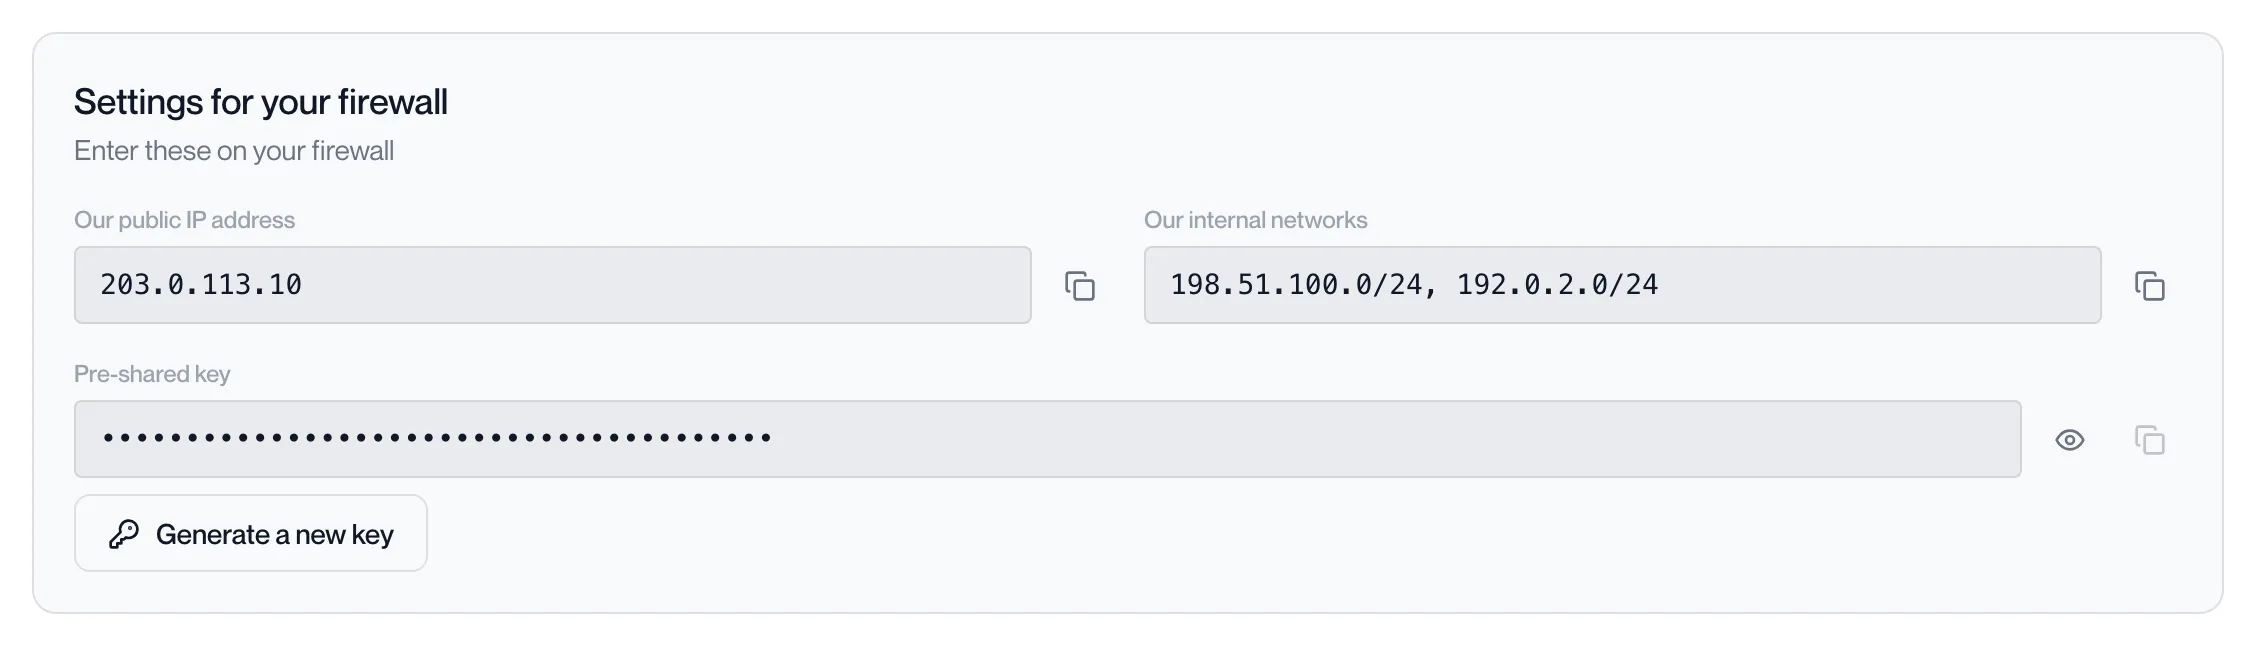
| Field | Enter it on your firewall as |
|---|---|
| Our public IP address | The remote gateway or peer address. The gateway connects to your firewall from this address. |
| Our internal networks | The remote networks behind the tunnel. Your workstations are in these ranges, which sit inside 100.64.0.0/10. |
| Pre-shared key | The pre-shared key for the peer. |
The pre-shared key
Section titled “The pre-shared key”-
Click Generate key.
The portal creates a random key and stores it sealed. The button reads Generate a new key once a key exists; clicking it replaces the key and the gateway is updated with the new one. Update your firewall with the new key at the same time.
-
Click the eye icon to reveal the key, then the copy icon.
The key is fetched only when you reveal it, and each reveal is recorded. The copy button is enabled while the key is shown.

Your side
Section titled “Your side”The second card, Your side, is what the gateway needs to know about your firewall.
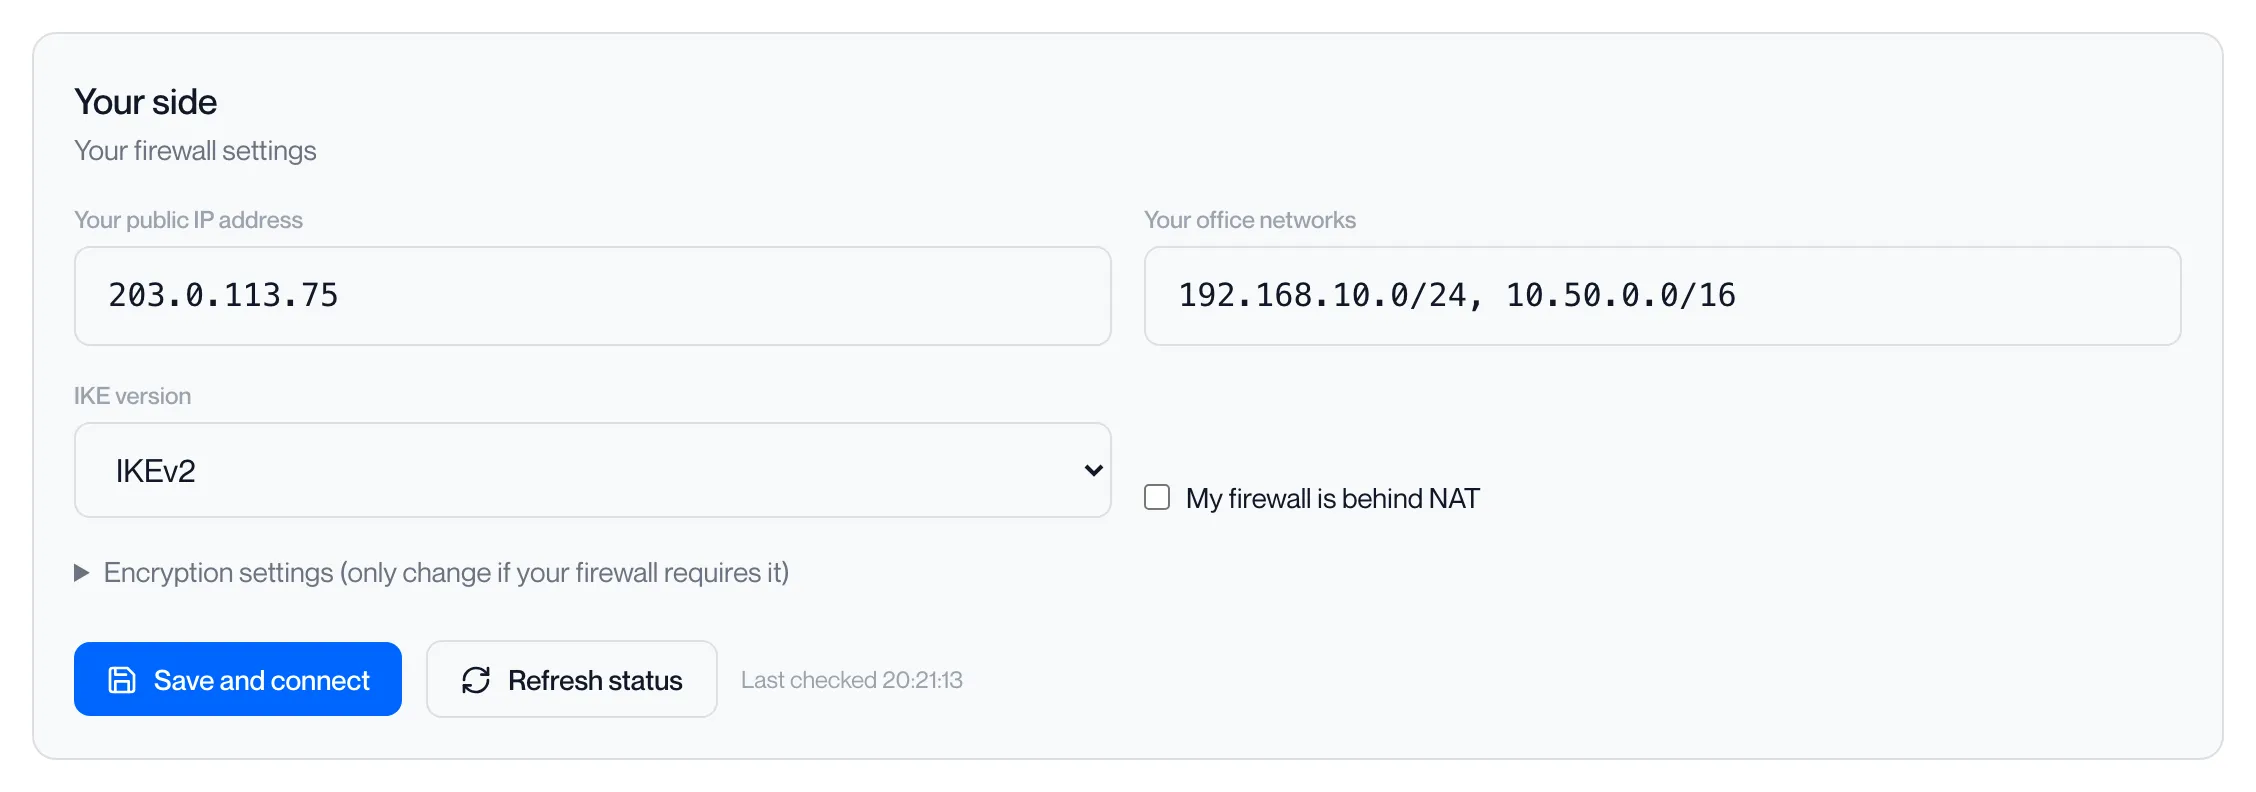
| Field | What to enter |
|---|---|
| Your public IP address | The public IPv4 address your firewall presents to the internet. One address. |
| Your office networks | The private networks behind your firewall that should reach workstations, in CIDR form, separated by commas: 192.168.10.0/24, 10.20.0.0/16. Each becomes its own tunnel. A network inside 100.64.0.0/10 is refused because it overlaps Computle’s own range. |
| IKE version | IKEv2 unless your firewall supports only IKEv1. |
| My firewall is behind NAT | Tick if your firewall’s public address belongs to a device in front of it. |
Click Save and connect. The portal checks the values before saving. A value it cannot accept is listed in red above the fields:
| Message | Fix |
|---|---|
peerAddress must be an IPv4 address | Your public IP address must be a plain IPv4 address, with no port or mask. |
remotePrefix "…" is not valid CIDR | Every office network needs a mask: 192.168.10.0/24. |
remotePrefix "…" overlaps Computle's 100.64.0.0/10 range and cannot be routed | Choose a network outside 100.64.0.0/10. |
After a successful save the page reads Applying your changes to the gateway until the gateway has taken the settings. See How it works.
Encryption settings
Section titled “Encryption settings”Open Encryption settings (only change if your firewall requires it) to set the proposals. Leave them blank unless your firewall insists on particular algorithms, and enter them in the firewall’s own wording: AES-256, SHA256, Group 14. The gateway normalises the names.
| Setting | Phase 1 (IKE) | Phase 2 (ESP) |
|---|---|---|
| encryption | Cipher for the IKE security association | Cipher for the tunnel |
| hash | Integrity algorithm | Integrity algorithm |
| dhGroup | Diffie-Hellman group | PFS group. Leave blank to turn perfect forward secrecy off. |
Match these on your firewall. The gateway also fixes the following; set your firewall to agree with them:
| Gateway setting | Value |
|---|---|
| Authentication | Pre-shared key |
| Who initiates | The Computle gateway, from our public IP address |
| Mode | Tunnel |
| Phase 2 lifetime | 3600 seconds |
| Perfect forward secrecy | On with the Phase 2 dhGroup when one is set; otherwise off |
| Dead peer detection | Every 30 seconds, 120 second timeout, then the tunnel restarts |
| Tunnels | One per office network, each from our internal networks to that network |
More than one connection
Section titled “More than one connection”A row of buttons above the tabs lists your connections. Click one to select it. You can have up to five.

Add a connection
Section titled “Add a connection”Use a second connection for another office or a data centre with its own firewall.
-
Type a name in the box at the right of the connection buttons.
The box reads “Name, e.g. Data centre”. Each name must be unique.
-
Click Add connection, or press Enter.
The page reads “name added” and selects the new connection. Computle’s side is already filled in and the connection has its own pre-shared key, so generate and copy that key for the new firewall. If the name is in use the page shows A connection with that name already exists.

-
Fill in Your side for the new connection and click Save and connect.
The steps are the same as for the first connection; see Your side.
When you have five connections the box is replaced by Maximum of 5 connections reached.
Rename a connection
Section titled “Rename a connection”-
Select the connection and click the pencil beside its name, or double-click the name.
The name becomes a text box.
-
Type the new name and press Enter, or click elsewhere.
The button shows the new name. Escape cancels without saving. If the name is in use the page shows A connection with that name already exists.; if the save fails, Could not rename the connection.
A connection marked read-only cannot be renamed.
A connection marked read-only was set up on the gateway by Computle and is shown for reference. Its fields are disabled, and the banner reads “This tunnel was set up directly on the gateway, so it is shown here for reference only and cannot be changed from the portal.” Contact your account manager to change it.