Workstations
Machine Imaging
Machine Imaging captures the disk of one workstation as a golden image and deploys that image to other workstations. Administrators use it to build a standard workstation once and roll it out to the rest of the estate.
Open Machine Imaging under Operations in the portal sidebar. The entry appears only when Machine Imaging is enabled for your organisation, and the page needs the Tenant Admin role.
The page
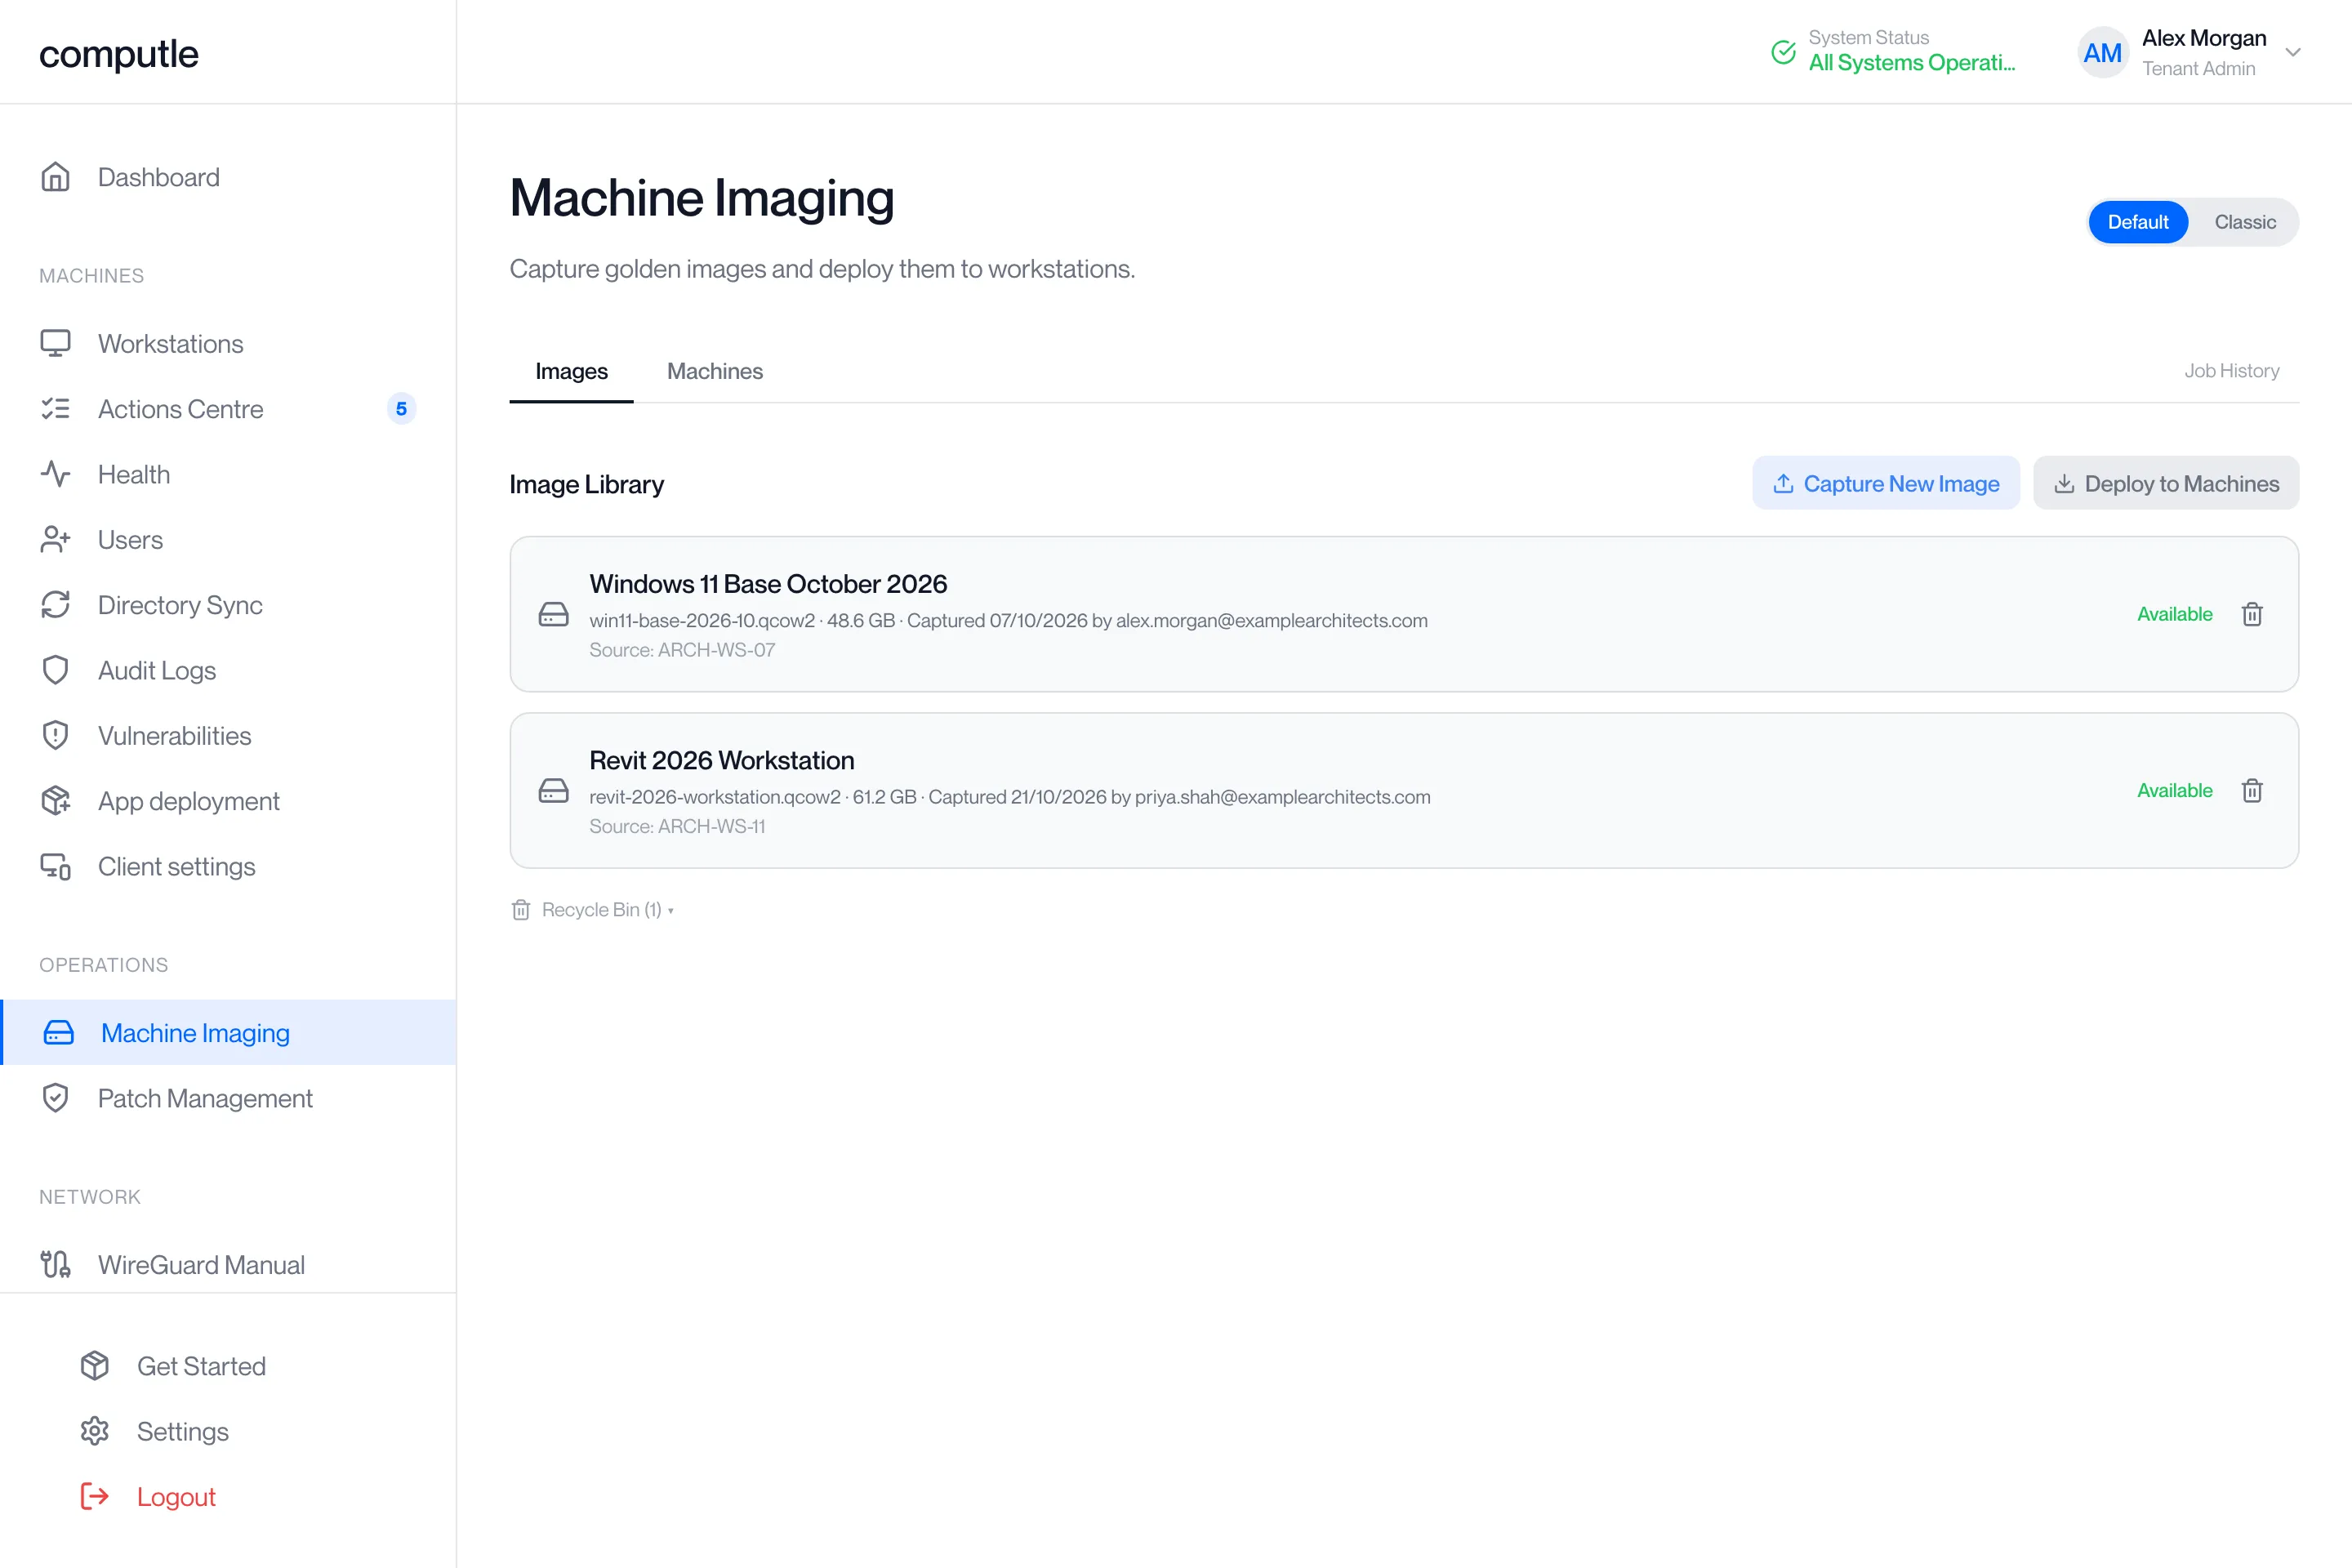
Section titled “The page”The page has two tabs, Images and Machines, and a Job History link at the right of the tab bar. While a capture or deploy is running, a bar above the tabs shows each active job with its progress message and percentage, and a View all jobs link opens the job history under it.
A Default / Classic switch at the top right changes the layout. Classic splits the same content across six tabs: Image Library, Capture Image, Deploy Image, Job History, Machine Status and Recycle Bin. This page describes the Default layout.
Images and jobs refresh every 10 seconds.
Images tab
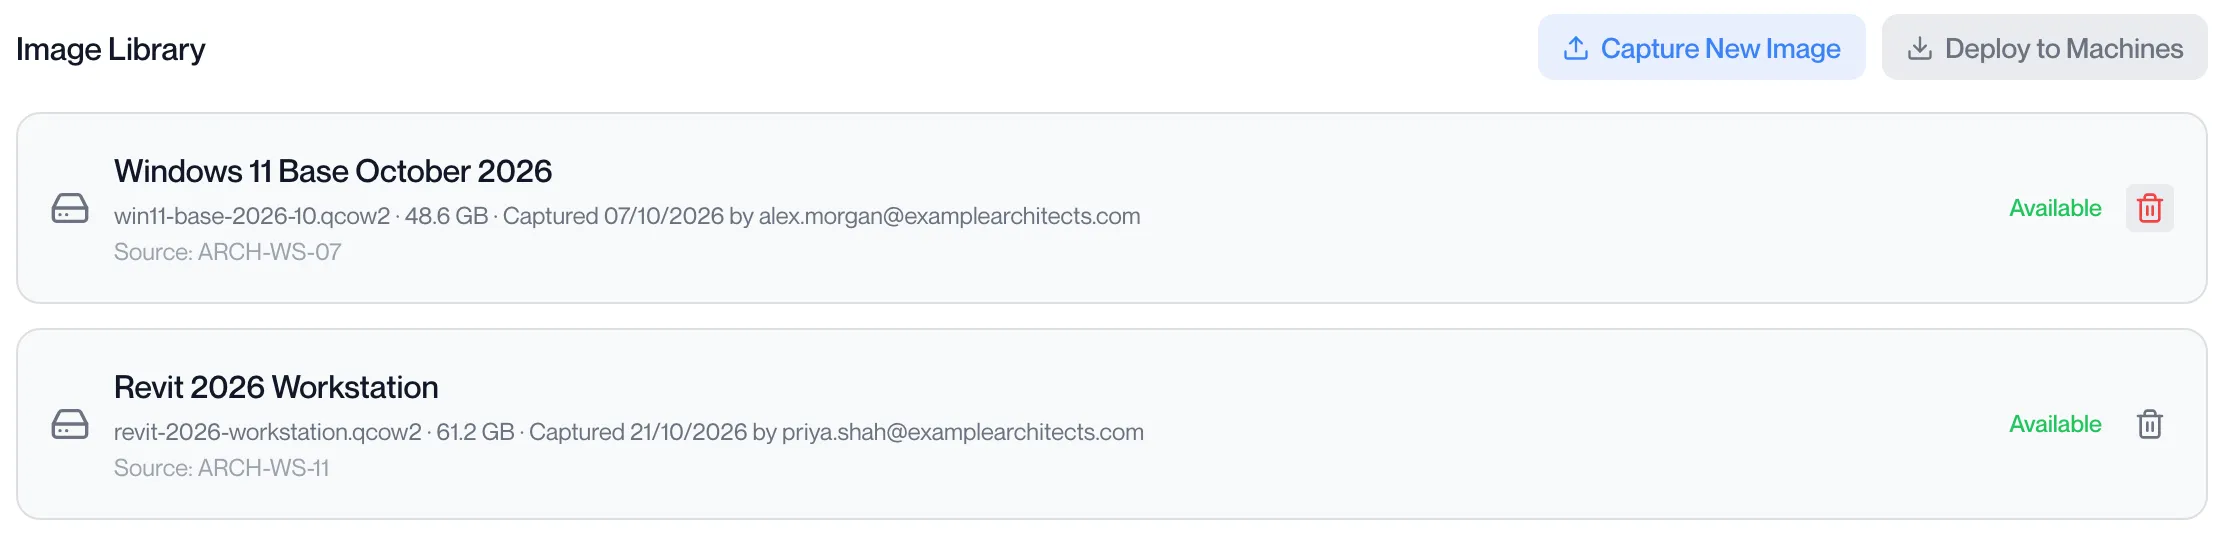
Section titled “Images tab”The Image Library lists each image with its name, file name, size, the date it was captured, who captured it and the source workstation. The status at the right reads:
| Status | Meaning |
|---|---|
| Available | Ready to deploy. |
| Deploying | Being deployed to a workstation now. |
An image that is being captured, or whose capture failed, is not listed here. When no image has been captured the library reads “No images captured yet.”
Machines tab
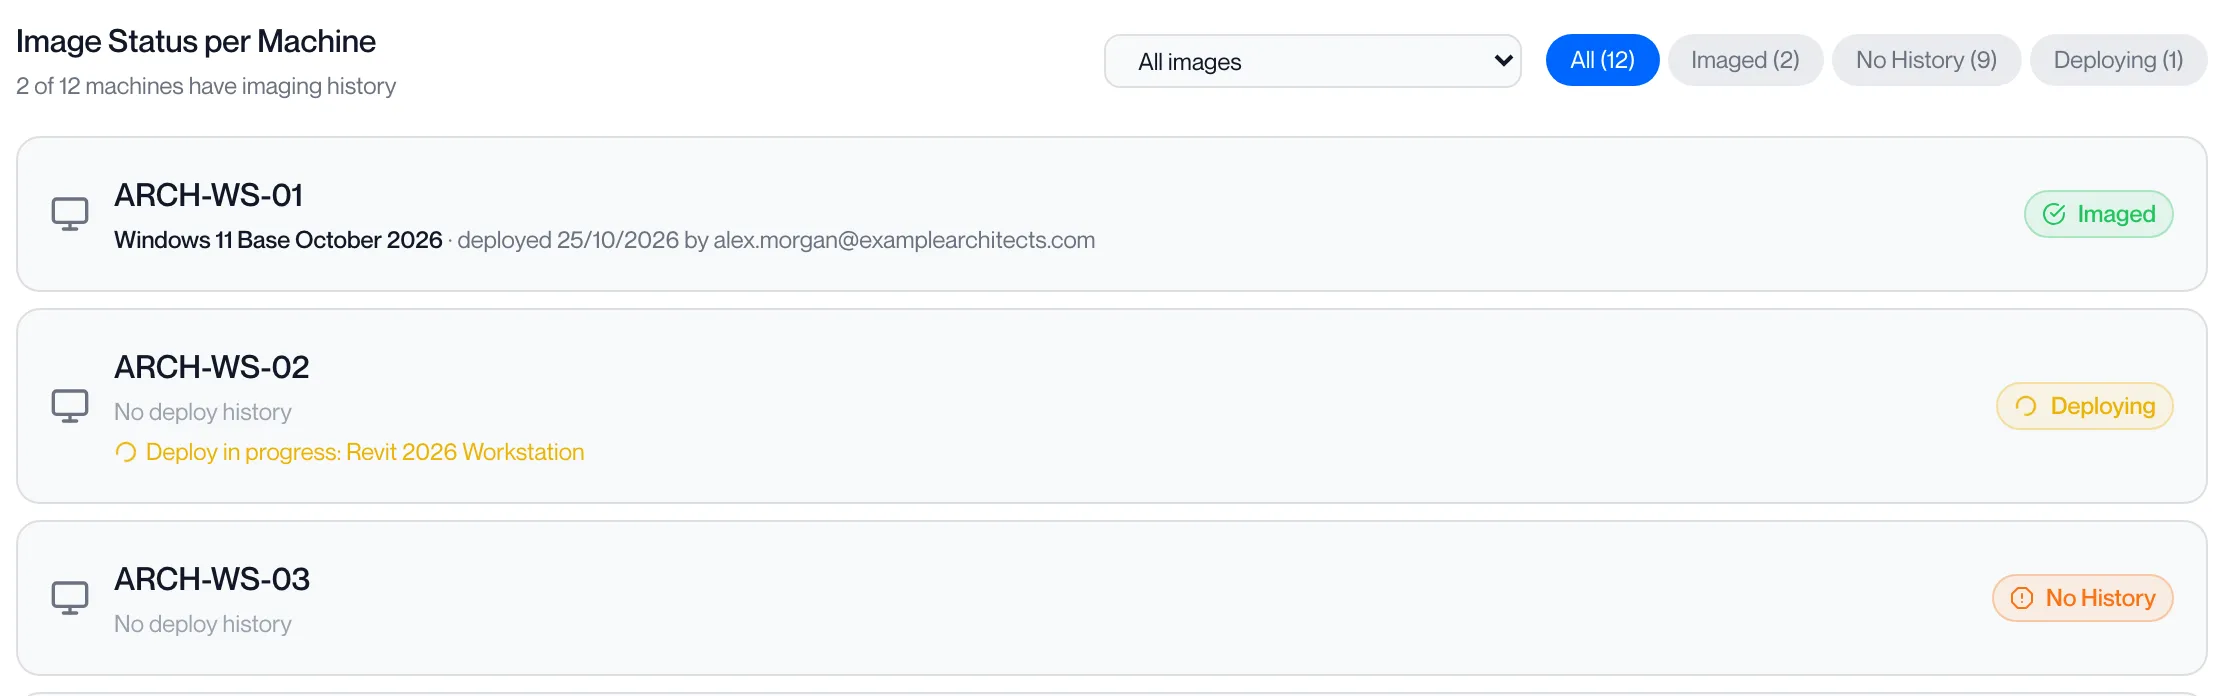
Section titled “Machines tab”Image Status per Machine lists every workstation with the image last deployed to it, the deploy date and who started it. The line under the heading reads “N of M machines have imaging history”.
| Badge | Meaning |
|---|---|
| Imaged | A deploy to this workstation has completed. The image name and date are shown. |
| Deploying | A deploy is running now. The line reads “Deploy in progress: …”. |
| No History | No deploy has completed on this workstation. |
Filter with the All, Imaged, No History and Deploying buttons, each with a count, or choose an image from the All images list to show only workstations that last received that image.
Capture an image
Section titled “Capture an image”-
On the Images tab, click Capture New Image.
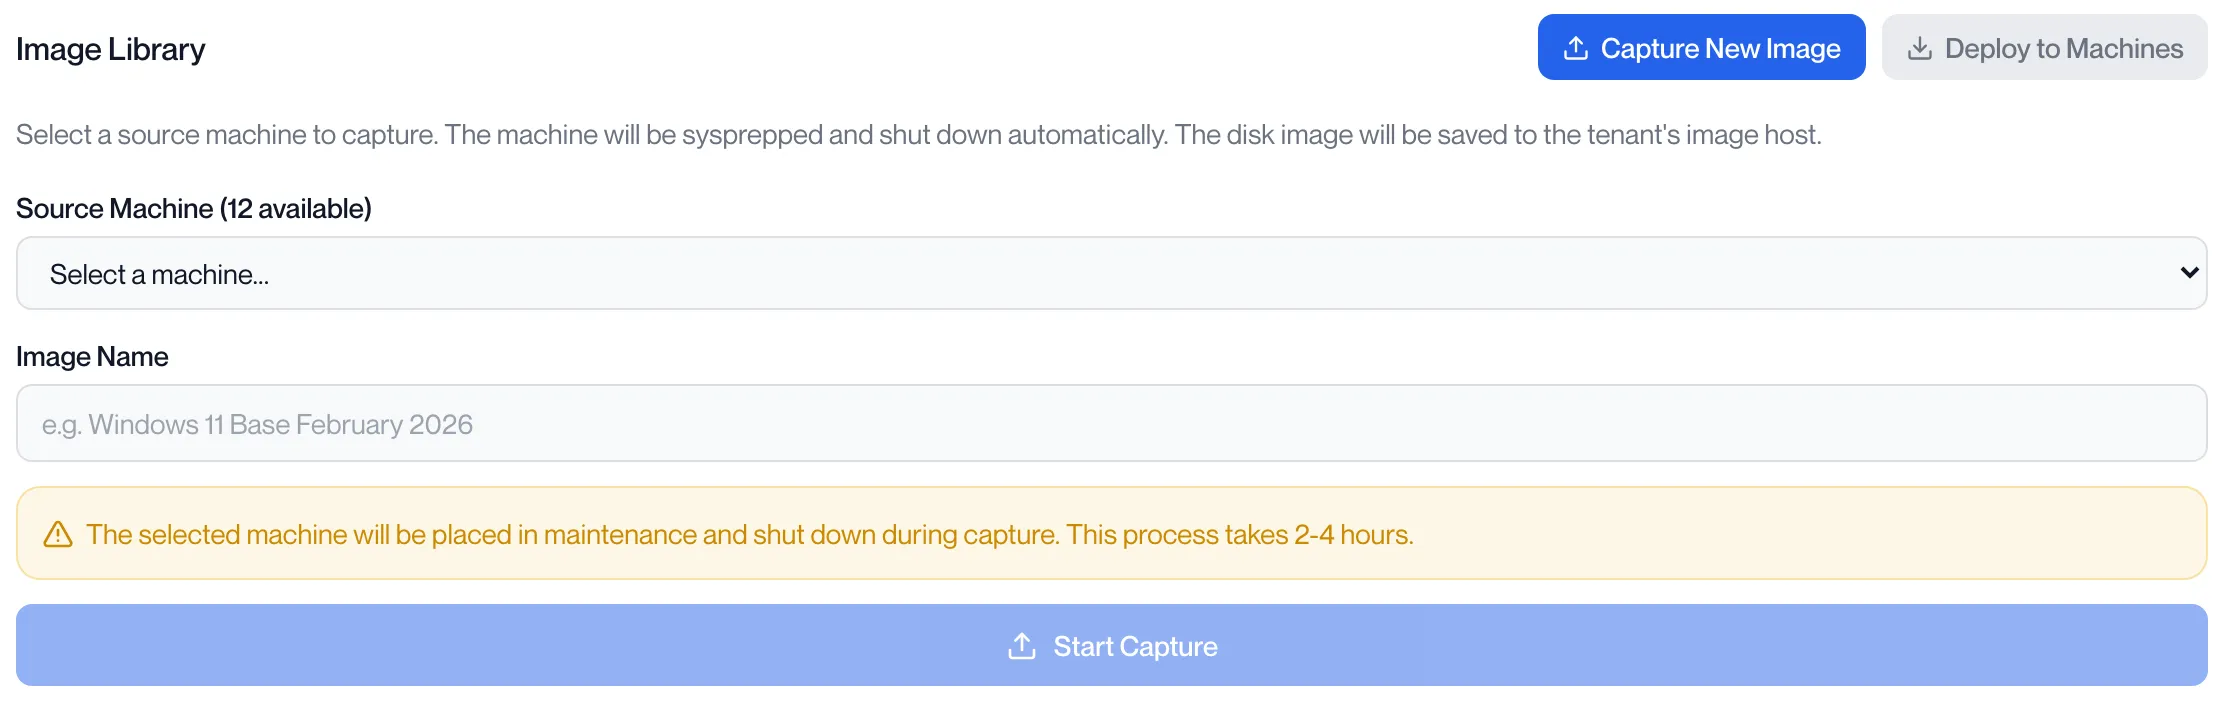
A form opens above the library.
-
Choose the Source Machine and enter an Image Name.
The list shows every workstation in your organisation by name. The name box suggests the form “Windows 11 Base February 2026”. Start Capture stays greyed out until both are filled in.
-
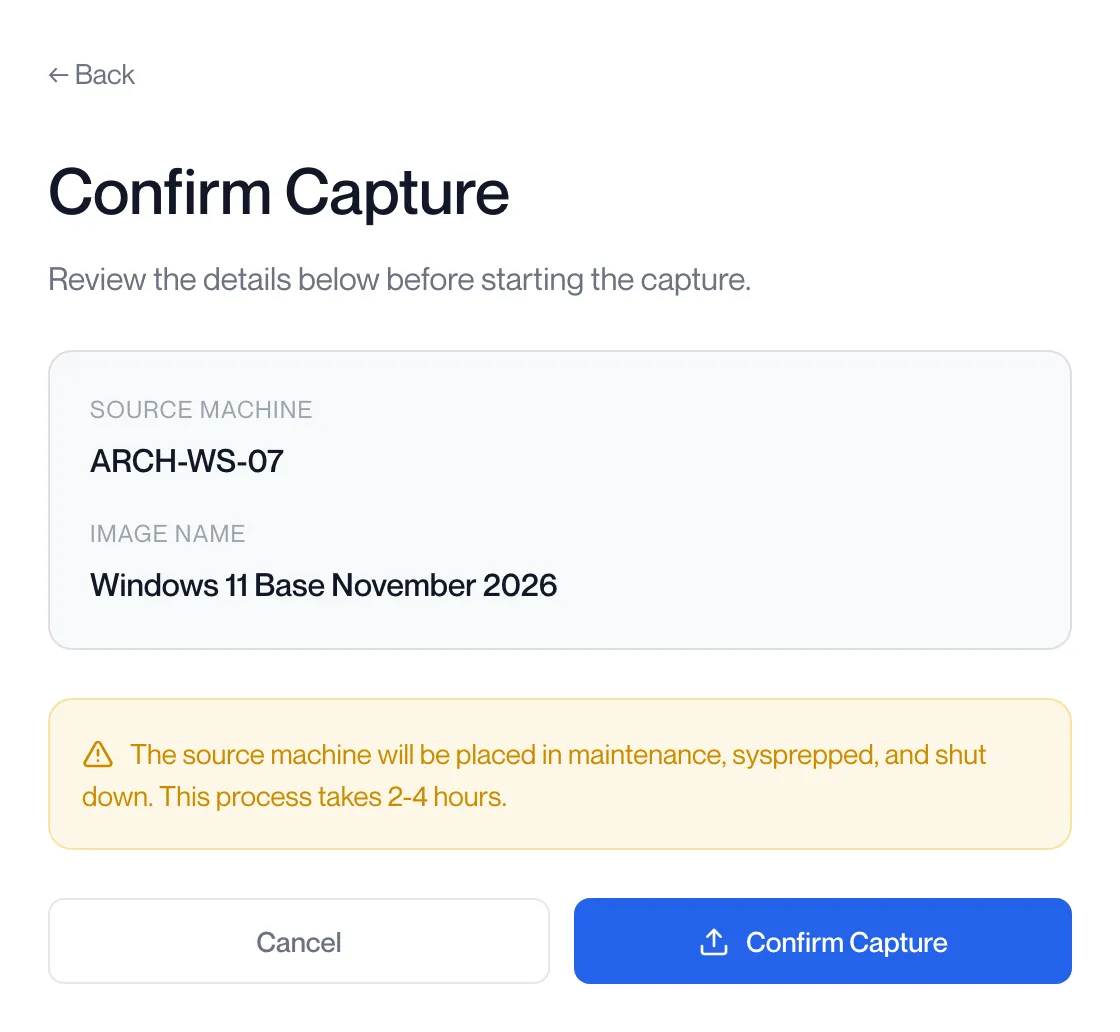
Click Start Capture, check the Confirm Capture page and click Confirm Capture.
The page shows the source machine and the image name with the notice “The source machine will be placed in maintenance, sysprepped, and shut down. This process takes 2-4 hours.”
-
Watch the job.
The portal switches to the job history. The capture shuts the workstation down and copies its disk to the image host as a backup, starts it to run Sysprep, waits for it to shut down, copies the disk again as the image and checks the copy. The progress message changes at each step, for example “Backing up disk: 40%”, “Running sysprep inside VM…” and “Copying disk: 75%”, ending with “Checksum computed. Capture complete.”
-
The image appears in the Image Library as Available.
The source workstation returns to the status it had before the capture.
A capture that fails shows Failed in the job history with the reason under it. The image is not added to the library.
Deploy an image
Section titled “Deploy an image”-
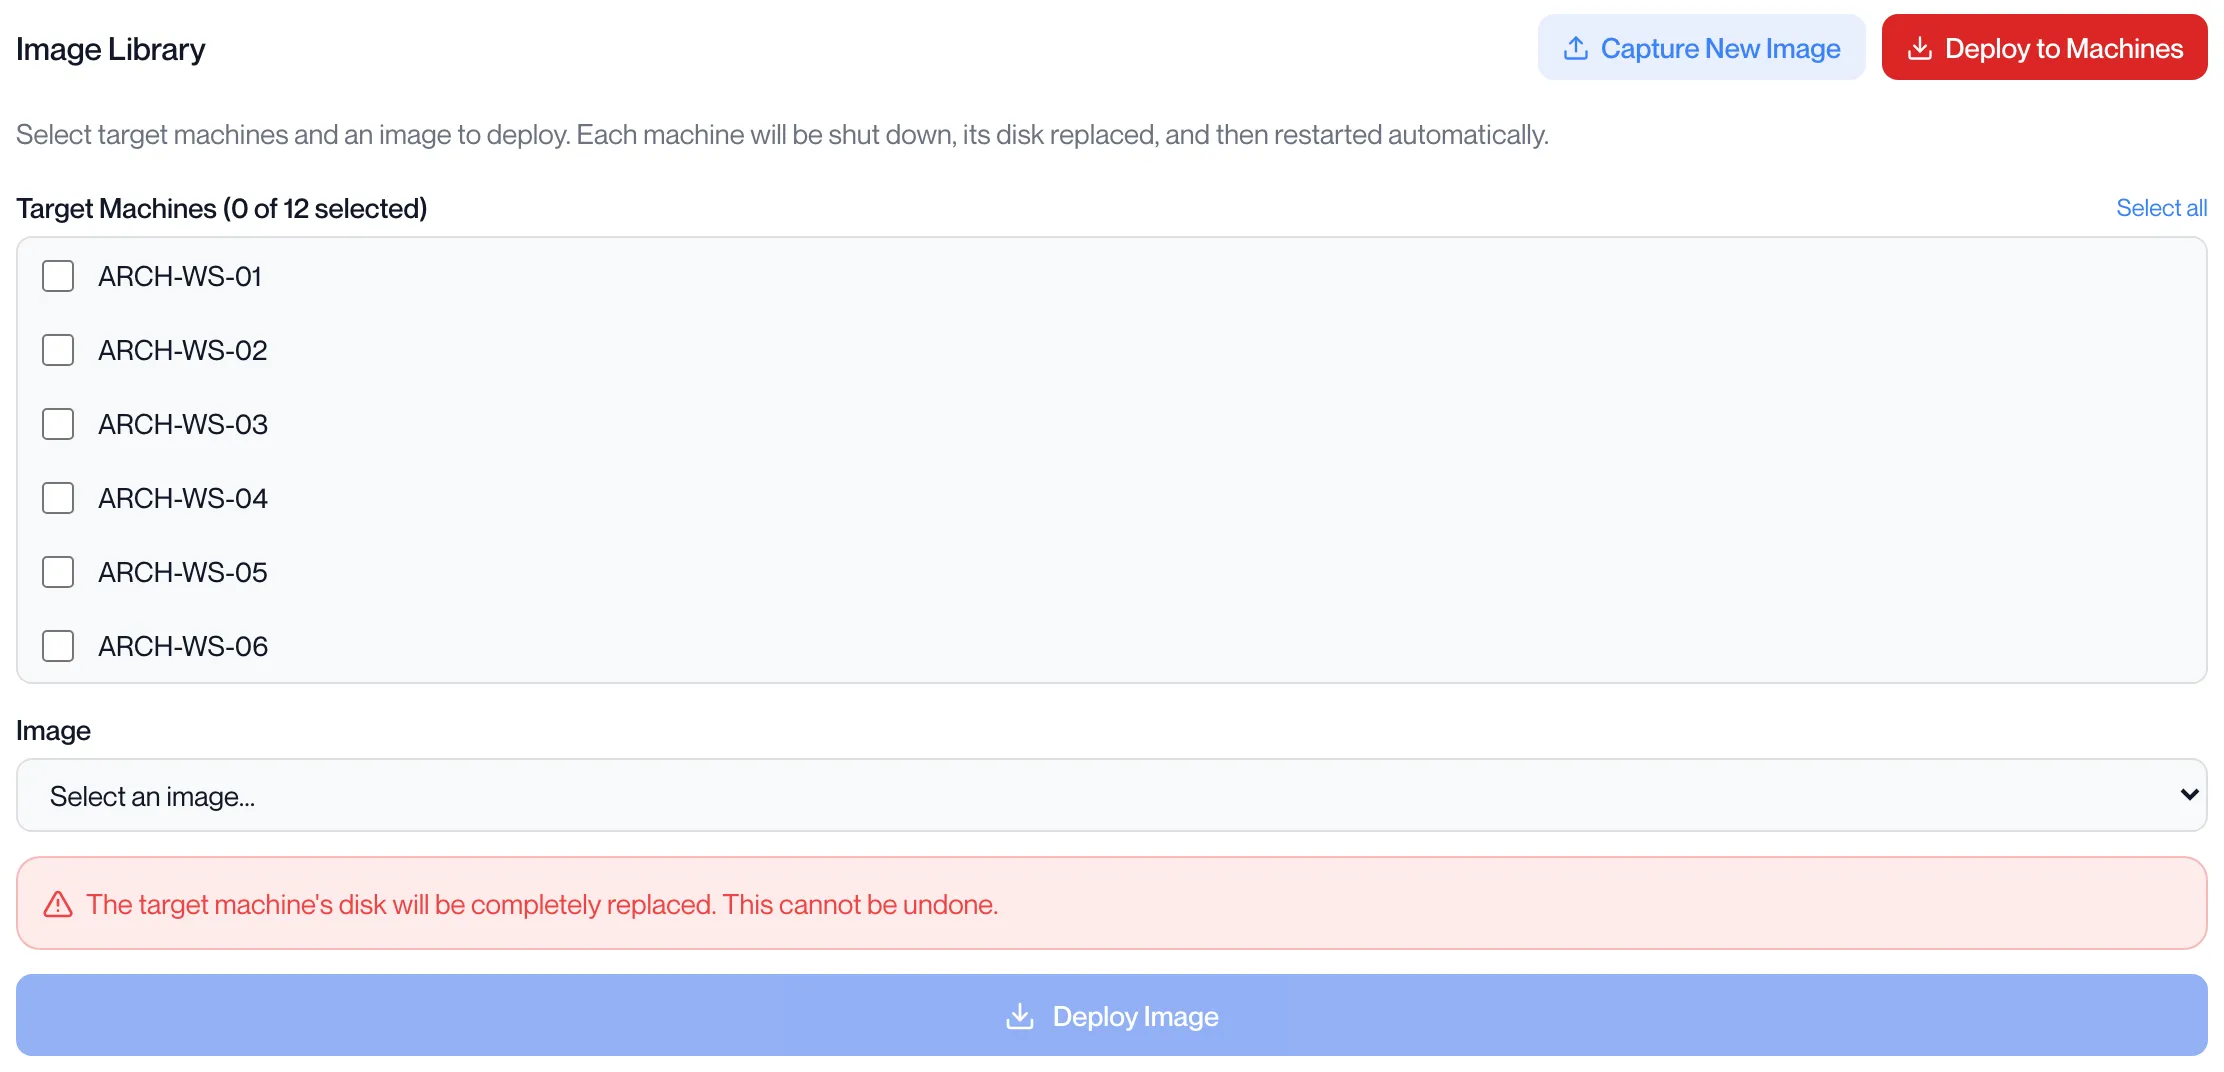
On the Images tab, click Deploy to Machines.
A form opens above the library.
-
Tick the Target Machines.
The heading counts them: “Target Machines (2 of 12 selected)”. Select all and Deselect all sit at the right.
-
Choose the Image.
Only Available images are listed, each with its size and capture date.
-
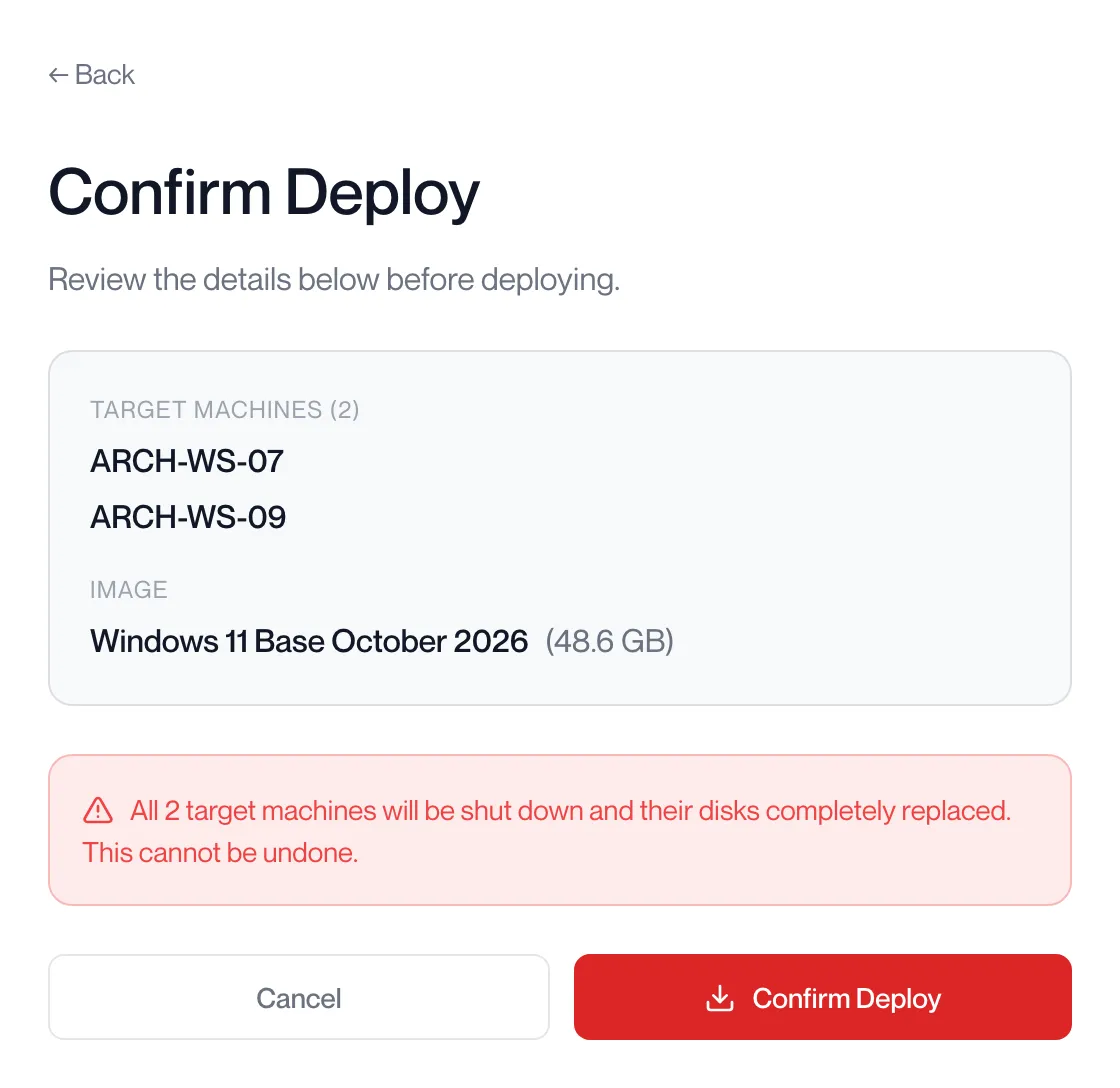
Click Deploy Image, or Deploy to N Machines, and check the Confirm Deploy page.
The page lists the target workstations and the image with its size. If any target has a user assigned the page shows “Cannot deploy: The following machines have users assigned. Unassign them first.” with the user for each, and Confirm Deploy is greyed out.
-
Click Confirm Deploy.
One job starts per target workstation. Each workstation is put in maintenance, shut down, its disk is replaced with the image, and it is started again. The progress message changes at each step, for example “Transferring image to hypervisor…”, “Starting machine…” and “Setting static IP”. If some of the jobs do not start the portal says “N of M deploys failed to start”.
-
The workstation returns to its previous status when the job completes.
The Machines tab shows it as Imaged with the image name and date.
Delete and restore an image
Section titled “Delete and restore an image”An image cannot be deleted while it is Deploying. A deleted image goes to the Recycle Bin, from where it can be restored.
Delete an image
Section titled “Delete an image”-
On the Images tab, click the bin icon on an Available image.
-
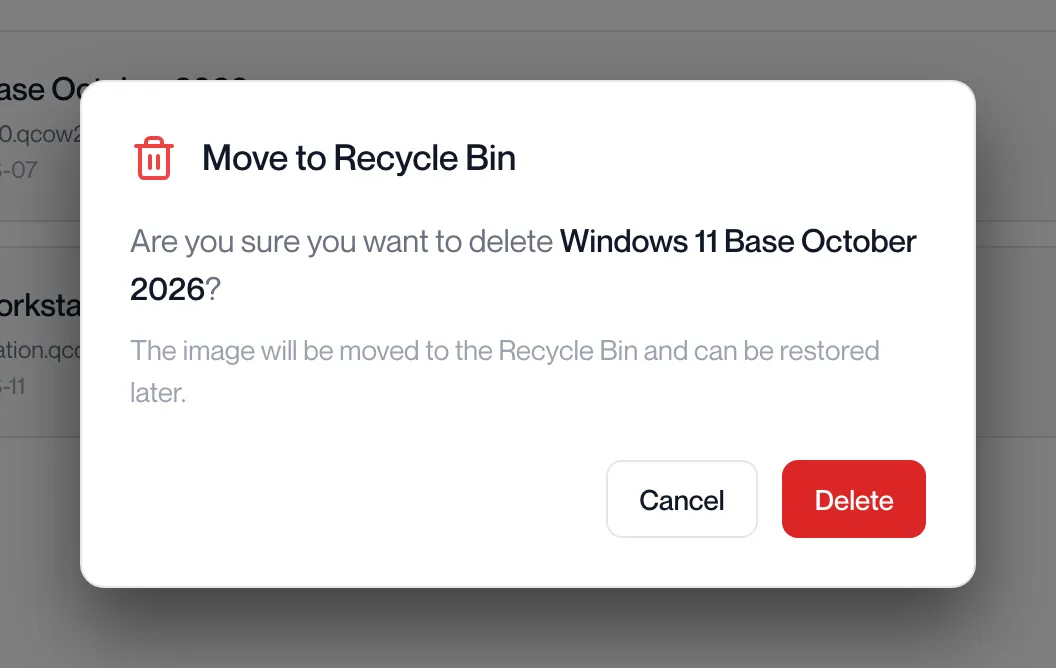
Read the Move to Recycle Bin dialog and click Delete.
The dialog asks “Are you sure you want to delete …?” and notes “The image will be moved to the Recycle Bin and can be restored later.”
-
The image leaves the library.
A Recycle Bin (1) link appears under the library. If the image could not be deleted the page shows “Failed to delete image” for five seconds; the image stays in the library.
Restore an image from the Recycle Bin
Section titled “Restore an image from the Recycle Bin”-
On the Images tab, click Recycle Bin (N) under the library.
The list opens under the link. Each entry shows the image name, file name, size, deletion date and source workstation.

-
Click Restore on the image.
The image returns to the Image Library as Available and the Recycle Bin count goes down by one. If it could not be restored the page shows “Failed to restore image” for five seconds.
Job history
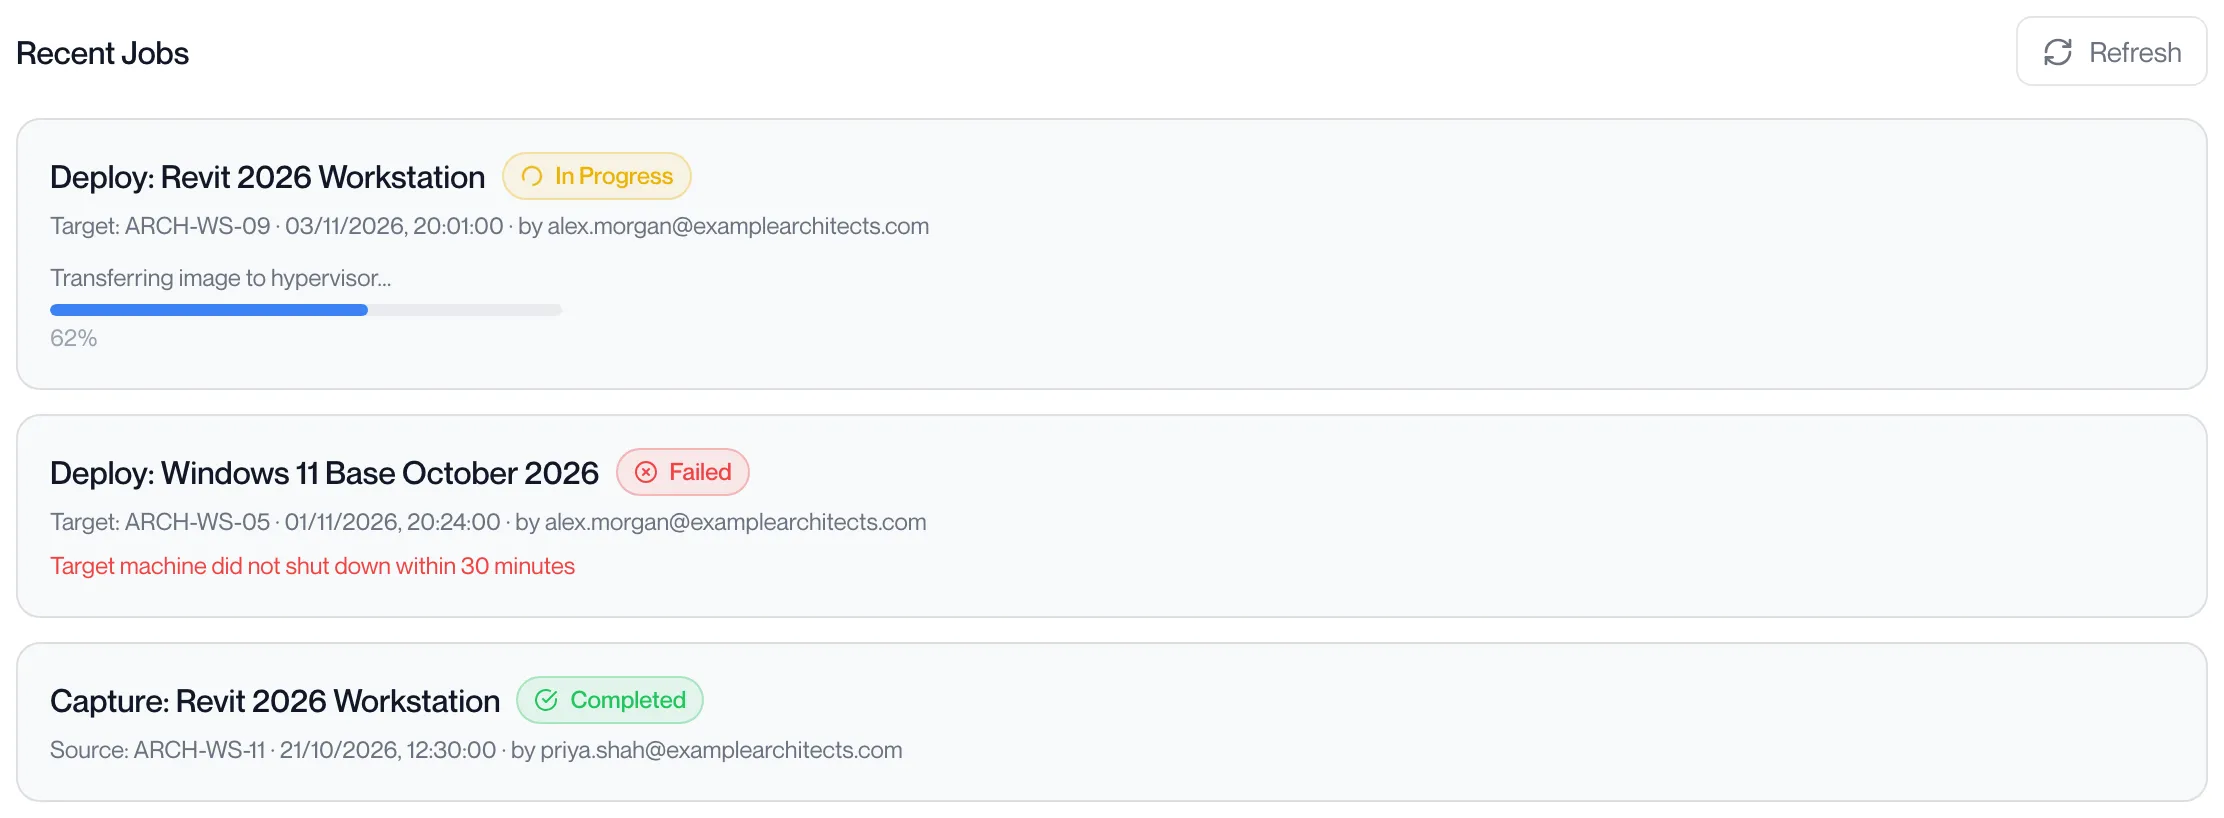
Section titled “Job history”Click Job History at the right of the tab bar, or View all jobs in the active jobs bar. Each job shows its type and image, “Capture: …” or “Deploy: …”, its status, the source or target workstation, when it was created and who started it. A running job shows its progress message, bar and percentage. A failed job shows the reason.
| Status | Meaning |
|---|---|
| Pending | Waiting to start. |
| In Progress | Running. |
| Completed | Finished. |
| Failed | Did not finish. The reason is shown under the job. |
The history holds the 50 most recent jobs. Click Refresh to reload it.
Check a job
Section titled “Check a job”-
Click Job History at the right of the tab bar.
While a job is running you can also click View all jobs in the bar above the tabs.
-
Find the job by its type, image and workstation.
Each entry reads “Capture: …” or “Deploy: …” with the source or target workstation, when it was created and who started it.
-
Read its status.
In Progress shows the current step, for example “Transferring image to hypervisor…”, with a bar and percentage. Completed means the capture or deploy finished. Failed shows the reason under the job; fix the cause and start the job again from the Images tab.
Related pages
Section titled “Related pages”Questions
Section titled “Questions”Confirm Deploy is greyed out. Why?
Section titled “Confirm Deploy is greyed out. Why?”One of the target workstations has a user assigned. The Confirm Deploy page lists which. Unassign them in Assigning Workstations and start the deploy again.
Can a user keep working on a workstation while its image is captured?
Section titled “Can a user keep working on a workstation while its image is captured?”No. The workstation is placed in maintenance and shut down for the capture, and it is generalised with Sysprep. Capture from a workstation set aside for the purpose.
How long does a capture take?
Section titled “How long does a capture take?”The portal states 2 to 4 hours. The disk is copied twice: once as a backup before Sysprep and once as the image.
Can I deploy an image to a workstation that already has one?
Section titled “Can I deploy an image to a workstation that already has one?”Yes. The deploy replaces the disk whatever is on it. The Machines tab shows the image last deployed to each workstation.
Where do the images live?
Section titled “Where do the images live?”On your organisation’s image host. The capture form says “The disk image will be saved to the tenant’s image host.”